Saturday, December 30, 2017

The Goods on Government-teaching levels of government

Another 2nd grade focused post coming at you! However, hopefully other grade levels can take something away from it as well!
TEKS covered: 2.12A, 2.12B, 2.12C, 2.12D, 2.13A, 2.13D

Learning about government can be overwhelming for little ones, hey maybe even for adults too, but it does have importance! How can you make it engaging and bring it down to a level that is easy to grasp?

Well hopefully we did that for our sweet second graders when the teachers taught this unit. We taught this unit over the course of 3 weeks and it did not integrate into reading because we were teaching fairy tales at the time so we had to be strategic with this particular unit and how we used our time for it.

Here is a quick glimpse of how I envisioned we break it down within those few weeks.

So if you read the last post I did about natural hazards/disasters, I said I typically will give my teachers an example/answer key/skeleton of any anchor charts I envision for a unit. This helps me to see if I need to tweak it at all, get feedback, and helps make their life a bit easier.

Right below you will see the smartboard I created that matches the kids brochure they were filling out as they learned about each level of government. That way the teacher had an option to integrate technology as well as make it large for everyone to follow along easier.


Directly above is an example of an anchor chart and answer key I created for the teachers to use as well if they wanted it. It also included some essential questions that align to the TEKS. So basically this chart is built on throughout the unit NOT all in one day!!

Grab the Smartboard download HERE (both versions included)

***The anchor chart above is not setup in the printable resource as a typical 8.5x11 size since it is designed to be printed large. You may want to preview on print screen, test print, or adjust printer settings before you print for youself as an anchor chart.***

We chunked the unit by teaching each level of government and then tying it all together at the end.
This chart is intended to be printed on a plotter aka poster maker. We are very blessed to have one so I was able to print off the skeleton of the chart and the teachers can laminate to use each year still utilizing the "make it with the kids" approach. It just gives them guidance.

So here is what the kids used as their interactive journal for the unit-the brochure!
This was also filled out throughout the unit. Some teachers elected the kids to glue it in their interactive notebooks and pulled it out when they needed it or took it up at the end of each learning time and handed it back out when they were completing the next section. 

You will notice I made them little pictures of each person to glue down, however, after completing it I decided not to include those in the download because well, if you don't live in Texas you won't have the same officials and eventually when the president changes I would have to go back and redo the whole resource. Sorry I just don't have that kind of time haha.
You can easily download pictures of your officials and make them small with multiple to a page.

So in order to make this easy I have included the TEXAS version of all you see AND a generic version (for those not in TX but teach levels of government). So when you download just make sure to pay attention to which pages you are printing :) 


Hopefully this helped you in some way and makes teaching government a tad easier and fun! Please don't hesitate to ask questions-sometimes I leave things out unintentionally because, well, my brain.is.tired.and.I.am.human. :)

Head over to take a peek and see if you'd like to add this resource to your teaching files!
Click HERE


IT IS ON SALE for the FIRST 48 HOURS!!! 


Have a BLESSED week! 

"You are my refuge and my shield; I have put my hope in your word."
Psalm 119:114


Friday, December 29, 2017

Discovering Natural Hazards with 2nd grade


This post is geared towards my Texas teachers! However, any teacher might take away some kind of nugget of info you might find useful! 

Here in the Lone Star State, depending on where exactly you are located, you can experience a small array of natural disasters. We don't have them all (thank goodness) but we have seen hurricanes, tornadoes, fires and  small earthquakes (although not as prevalent as some places).
Again, depending on where you are living does somewhat determine which of those you may have experience with. I mean we do take up a huge chunk of land area in the lower USA. 

We are required to teach natural hazards/disasters in second grade so while trying to plan with the 2nd grade team I wanted to steer them in more of an inquiry based learning for this unit. We didn't have just an abundance of time for this unit (imagine that right?) and it also did not integrate with reading nicely (traditional literature was happening at the moment). 

The first step was gathering some resources for the kids to look through, use, read, etc. I made each teacher a tub of books from the literacy library that included, but not limited to, some of these types of titles. 
 
We also have other resources we can pull from as well other than just books on campus. There are always online resources to scour ahead of time and pull out what is appropriate for your grade level (2nd grade in this case). 
Now these were not the only hazards we learned about. We stuck to the TEKS and out unit plans outlined by the district and that included: tornadoes, hurricanes, wildfires, earthquakes, volcanoes, and we also briefly touched on tsunamis. 

Since this was being taught over the course of 3 weeks I created an anchor chart outline they could use and build on as they discussed and learned. I wanted it to include the key essential questions outlined in the TEKS and our unit plans. I am a very visual person myself so when I am brainstorming for the teachers I also like to include an example for them to be able to see what I am envisioning and they can give me feedback as needed too! So this is the outline and example of what  I saw them utilizing with the kids as the main class recording device. 


So here is somewhat of a break down of what I envisioned throughout the unit. 
*Break kids into 5 different groups (one natural disaster per group).

*Facilitate some time for the kids to ask questions among the group about the particular disaster they are assigned.

*Each group can get some books (or use IPADs or other electronic devices with online resources) that pertains to their designated topic and start looking for maybe some of the key questions from the anchor chart or just collaborating with a few new facts from the text or pictures they are discovering. 

Now how you go about getting that information back to the whole group from each small group is up to you. It can be determined by how long you have each day, how long your unit is, preference as the teacher, etc. This is definitely not intended to be done in one day..mainly small chunks of time as you build on  the info. 

Some ideas may be:
-gather whole class back together after pre-determined time allotted to search books, ask questions, look for answers (that may take multiple days of smaller chunks of time)

-have each group provide any info they learned that can answer those questions on the anchor chart and discuss as a whole group

-do one natural hazard a day

-work through one whole column with multiple disasters a day

-small groups make posters to represent the info they did find to answer the anchor chart questions (they may not find it all and that is okay) then do a gallery walk where each group gets to learn about the others, then take it to the large anchor chart another day

-give the kids in the small group the sticky notes to go through and answer the questions from the large anchor chart and they can fill out as much as they learned from their research and then as a class you can go back and fill in the spots they were unsure of or needed guidance

-you can also put up pictures of a locations around the world that experience various hazards to facilitate discussion and questions

-show pictures of places BEFORE a natural disaster occurred and then an AFTER picture to discuss and maybe help lend some answers to the questions on the chart

-content WRITING would fit nicely into this unit as well
EX: Would you live in a location a ____________ can occur frequently? Why or why not?


So you can see there are a ton of ways to be able to facilitate some discovery and learning on this topic and probably a lot more I am not thinking of currently. 

You may also have some time to watch some video clips for the kids to get more of an understanding as needed. If you have access to Discovery Education you can find some videos aligned to the topic and narrow it down by K-2. BrainPop Jr. also has a video on "Fast Land Changes" that might be helpful as well! 

Here are some examples from the teachers anchor charts! You can see some shared the pen and some chose to write what the kids said, both totally okay! 


 Hopefully this little post gave you some new ideas or even maybe just was the tip of the iceberg for you that will help you launch a natural hazard unit in your classroom that spawns many other ideas I didn't even list!

**TEKS Covered: 2.7A, 2.7B, 2.7C

Have a BLESSED week! 
"So let us come boldly to the throne of our gracious God."
Hebrews 4:16 


Thursday, December 7, 2017

Easy recycled/reused Christmas Decor

Do you ever get a Christmas card that is just too pretty to throw away? I mean cards in general now days are not always cheap. I have actually received cards other than Christmas (birthday, Easter, etc) that are beautiful and I try to keep what I can but let's be real, I don't like a lot of "stuff'" and try to purge as much as possible. However, for those extra special cards that are just too good to toss I decided to use as an easy DIY project.


I made this particular one for Christmas. But you could use any kind of card front depending on the theme or look you are wanting to achieve.


What you will need:
-front of a used card (I just pull off the back to keep the front)
-scrapbook paper
-frame of your own size and choosing
-scissors

It really is as easy as it looks in the picture! Once you decide your size and if you will use matting or scrapbook paper all you do is put it together! Seriously, easy right? And you get to reuse/recycle those beautiful cards! I mean it could easily be a gift as well! Put your own spin on it!

Here are some other examples of fronts of cards I have saved and just waiting for the right moment to create something.
See? Too pretty to toss!


Have a BLESSED night!! 
"But the Lord watches over all who honor and trust his kindness." - Psalms 33:18


Wednesday, October 25, 2017

Book Bites Episode 3-The Hallo-Wiener

Howdy ya'll! So I am a smidge behind on blogging so I am kind of doing a catch-up session here for Book Bites Episode 3.

If you are just now discovering my little blog and have no idea what Book Bites is then head over to the overview HERE to get a background of this little venture. You can also view the overview video HERE

Now onto Episode 3! 
The Hallo-Wiener  
by: Dav Pilkey 


** The video will have more detailed information about all these ideas below- this is just a quick sneak peek**


Overview: Oscar is short, like all dachshunds, and other dogs make fun of him. On Halloween he takes more ridicule than ever in his hot-dog costume, but one brave act makes him a hero.

Teaching points: (if you choose) bullying, character feelings 

Sticky notes: I do not have specific stopping points for this read aloud this time.I really wanted this seasonal one to be more of an enjoyment read with maybe some follow up fun activities.
Grab the Mini Integrated Unit HERE

Here's a peek at what is included: 

-Dog template to create craft

-Give Oscar a new costume

-2 Story element activities
-Retell/BME
-Book review
-Text to Self Connections
-DIY Word Family Sort
-Trick or Treat (true or false)
-Create your own Trick or Treat
-Verb practice
-Verb cards
-Story element cards
-2 Odd/Even sort
-Count by 5's cut/paste
-Count by 2's cut/paste
-On/off the decade practice
-Place Value


Here is an example of on of the activities! 


Access the full Episode 3 HERE

Want just the read aloud? Go listen and watch HERE


Don't forget to follow me on Facebook to get notifications of when new Book Bites Episodes are happening! You can also access all of them on my YouTube channel!

Have a BLESSED week!

Sunday, October 8, 2017

Scooping Up Reading Craftivity

Well hello there!
I feel like it has been awhile since I "for real" blogged. What's "for real" blogging? Well other than a quick check in on my Facebook blog page or Instagram and actually sitting down and typing a full post is "real blogging." I have SO many ideas I have written down to blog about but it truly is finding the time and sometimes the motivation to gather it all and focus to put it into words. But that's why I have my idea notebook! So I don't forget and hopefully will eventually get around to it! 

For tonight though this will be short and SWEET. Most importantly though, SWEET!! 
Do you like reading? 
Do you like ice cream?
Do you like a reason to throw a party?
Then this little FREEBIE is for YOU! Well for your kids, but you will reap the tasty benefits too! 

Here is the low down:
This little reflection craft can be used at the end of teaching different types of reading strategies. For example, we used this at the end of 2nd grade Lucy Calkins Reading Units of Study Unit 1 Session 4 “Readers Read in Longer Phrases Scooping Up Snap Words”. After teaching various ways and strategies that can be used while reading, second grade held a “Scooping up Reading” party. The kids reviewed the strategies that have been taught and created the ice cream craft. Then they got to celebrate with some ice cream scooping! (they also offered sorbet as an option for dairy              allergies)
This provides a fun way to wrap up or practice what they have been taught.

 Go grab the freebie HERE

Thank you so much to the 2nd grade ELA team for helping me bring this idea to life! Ya'll it's hard going from having your own classroom and babies to do these things with, to not having the direct opportunity to do so. Thankfully I work with some really awesome teachers throughout the grades that allow me to continue to still be ME and offer up ideas and create things for their little ones to do and try. We work hard and take our jobs building those minds seriously, but we also know how to have some fun!! 

Have a BLESSED week!! 
"I am the Alpha and the Omega. The beginning and the end, says the Lord God." Revelations 1:8

Wednesday, September 27, 2017

No More "What's Due?" Manage the paper monster!


How do you manage your classroom work and objectives? I am sure if your classroom is anything in the form of a normal classroom you have a lot going on throughout the week. Things can start piling up if you do not have some kind of a system in place. Even if a majority of what you do is in Interactive Notebooks, Seesaw, etc you can still get bogged down with what needs to be checked. Well I have tried various different things over the years and finally have settled on my newest technique. I have tweaked it and have seen such good results. And I promise you even 1st graders can manage it! 

The To-Do board! 
I have posted in the past about my kids having the chance to earn Fun Friday. After they accomplish all of their goals for the week they can earn that extra time to just be a kid and have some fun. I mean we work so hard during the week! 

On my back wall I have two empty cabinet fronts (prime real estate ya know?). I made picture icons of the objectives they would typically be faced with throughout the week as well as icons for what to do with the assignments when complete. I mean who just craves hearing..."I'm done!" What do I do with this? Where do I put it?" Well I can tell you I do not haha...I really want to foster independence and problem solving skills within those 4 walls. 
(I would have offered the icons as a freebie but it is tailored to what we do specifically, you would need to take pictures for your own icons-sorry!) 

Now we had a lot rolling this week so it looks kind of overwhelming to the naked eye lol...but my little owls have been trained on this and can execute it pretty well now days.


I put any assignment we have started and needs to be finished by Friday on the left side. On the right side I put the picture icon for where or what they need to do with it so they do not have to ask. 

"Corner of desk"- this tells me non-verbally I am done and you can come check my work. Most of these assignments/work was done in their interactive notebooks or folders where we didn't have to have extra copies made and waste paper or bury them in worksheets. 

"File"- I have made a file system at the front of the room with all their numbers on a file folder. They can slip their finished work in their and on Thursday and Friday morning I will check it.


"Picture of Me" - they can hand deliver it or also put it out on desk so I can come snatch it at my convenience. I don't typically use this one often but will when it is something I want right away.

"Work folder"- everyone every week has to have this out before starting Fun Friday. I do have some try to slip through the cracks each week and "say" they are done ;) ya know what I mean Vern?

The numbers next to the assignment are the magic numbers for the kids whose items I have not checked or have turned in. Once it is done I get to erase it off the board. I can tell you they love seeing their number go away. This is also helpful for some of my friends who are still learning to read. They know their number by heart already and the picture icons are obviously super fast to see as well! 


Here are some up close looks:


I really can't tell you how efficient this has made our weeks, and I love being able to see them turn around without me having to really say anything and check the to-do board on their own and Get 'Er Done! 

 I hope it sparked your interest if you are looking to streamline paper/assignment management in your classroom! 

Have a BLESSED week!!!

Sunday, September 17, 2017

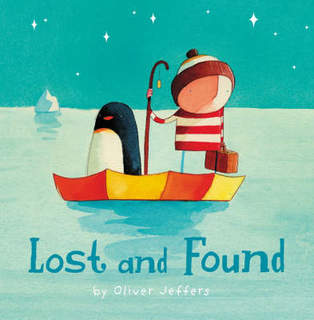
Book Bites Episode 2- Lost and Found


Guess what?! I have another full episode of Book Bites done! 

I also did a "Minisode" as well! You can catch that HERE! It was over the ADORABLE book, Nerdy Birdy Tweets. I also made the read loud version as well so you can still enjoy the book even if you don't have it yet! You can watch that HERE.

If you are just now discovering my little blog and have no idea what Book Bites is then head over to the overview HERE to get a background of this little venture. You can also view the overview video HERE

Now onto the main attraction: Episode 2! 
Lost and Found 
by: Oliver Jeffers

** The video will have more detailed information about all these ideas below- this is just a quick sneak peek**


Overview:
 Lost and Found is a simple tale about a boy and a penguin and their growing friendship.


Teaching points:
Connections, Inferences, Main Idea

Sticky notes:
Here are the suggested stopping points for this book- remember you may want to do every one all at once. These are front loaded so you decide when and how to use them.
Grab them HERE
When you get to the link the "supporting document" is what you want to click under the video. 

Other ideas to incorporate this text: (all of these ideas are described more fully in the video)
-Do a book talk before reading to kids-this would be a little personal story you have in connection to the book. For example, I might tell them about the time I found our rescue dog. He just happened upon us one day as an orphan and we thought we needed to adopt him out. However, we decided to keep him and we love him so much! This just helps to really personalize it and model that for the kids.
-After reading you may want to have an accountable talk circle: What does it mean to be lonely? How can we help others not feel lonely?
-Integrate into writing: How did the penguin end up at the boy's door? Create a "Found Penguin" poster, What would you take on your journey to return the penguin?

I will also use some short little acronyms in the stickys as well. You will decide when and where to actually stop reading and have your kids discuss so I give options.
T&T- turn and talk (incorporate Teach/Okay for Whole Brain)
TO-think out loud (more so for the teacher to do)

Access the full Episode 2  VIDEO 

Want just the read aloud? Go listen and watch HERE

Don't forget to follow me on Facebook to get notifications of when new Book Bites Episodes are happening! You can also access all of them on my YouTube channel!


Stay tuned for the next full episode or even "minisode" where I will feature another fun book!

Have a BLESSED Week!! 


Saturday, July 29, 2017

Book Bites-Intro to Book Bites and Episode 1


Welcome to Book Bites! I am so glad you stopped by to read or stumbled across the video on FB! My wish is that you find something positive and useful each time you visit Book Bites.


Why Book Bites?
A love of books of course! All books! Math, ELA, Science, SS, Professional, etc! Teaching can be overwhelming, especially all the possible literature available to be able to use in the classroom. I want to be able to share titles of books (specifically read alouds) that are well known but also maybe titles you have never heard of or used. 

What will you get with Book Bites?
During this series I am hoping to be able to provide a nice little sampling, a taste, of sorts, to all things literature. Hence the name, Book Bites!
I am hoping to give any of the following:
-overview of the book
-sticky notes for teaching
-ideas for teaching points
-maybe even some extra resources, craft-tivity, etc

I will also feature books across content areas-math, language, science, ss!

I may have suggestions for which grade levels for the books, but ultimately it will be up to you to decide if it will work for you and your group!
Some times I might just pop in with a recommendation of a new book without allll the extras, but just to give you a taste of the book so you can decide if it would be of interest for you! That is what I would call a "minisode" where I will probably do a quick video over on FB or Instagram, so hopefully you follow me there! Just search The Blessed OCDiva! 

When will Book Bites happen?
I am striving for at least once a month at first for the big videos and resource uploads. This is time consuming so I have to prepare everything for ya'll and get it uploaded. If time permits I may pop in more frequently. Some Book Bites may happen LIVE on FB or pre-recorded. So keep your eyes peeled over on my FB page for frequent updates! 


If you are familiar with workshop, you know read alouds are very important within reading time. There are many benefits to reading aloud to your students.
-Intro students to engaging, entertaining, and though provoking literature
-Model expressive and fluent reading 
-Lead student discussion through accountable talk
-Builds literacy skills:vocabulary, phonics, storytelling, and comprehension


There are also many benefits of implementing accountable talk:
-stimulates higher order thinking
-reflecting on learning
-communicates learning and understanding with others not just the teacher

A few years into teaching I realized how important preparing for the read aloud and being familiar with how you were going to implement it throughout the week was for not only the students but for me to use time strategically and effectively. 
One thing I did do with my team during planning times was to go through the read aloud we were using together and make notes on stickys of where we wanted to stop and talk, turn and talk, how to model, teaching point, etc. This is very beneficial for new teachers, however, 10 years later for me I love still doing this and it again helps keep me accountable. We all know how quickly the day can go and how precious the time is during workshop.

Another thing to note, when I give suggestions for stickys , I may give multiple and some may not be appropriate for certain grades at certain times of the year. I am just kind of brain dumping so I can squeeze as many different lessons out for ya'll to chose from. When you sticky note, you can skip some I suggest or tweak until they work for you. You won't ever have time to stop at every sticky when it is overloaded, you need to be focused and particular on what is the objective you are trying to hit home and hone in on that. 

Another tip I have realized is that you do not have to have a million books to be effective on read aloud (although having a million books isn't a bad thing haha, I am quite the book hoarder myself). But if you do not have the resources or financial ability to hoard books, only having a few very effective books can still get the job done. I have been sitting in planning looking at a book and I find SO many teaching points and places for accountable talk that would not be possible to address in one mini lesson. So what do I do? I go ahead and make those notes so I don't forget and then I have it ready when I want to pull that book back out to teach a different point.

It is also important to remember sometimes it is okay and beneficial to do a read aloud just for enjoyment the first day then revisit it for the particular modeling, stop and talk,etc. Every book you read does not need a whole lesson made around it or talked to death. Sometimes kids just need to hear the story and enjoy it. You as the teacher professional have to decide when, where, how, which, and why you are choosing a book for a read aloud for workshop. 

If I provide the notes/info for Book Bites sometimes it may look overwhelming at first glance, however, they are meant to front load you all at once and then you can go in and choose what you need and when you need it based on your teaching schedule. Hope that makes sense. Using whole brain with these as well work wonderfully (Teach, Ok- gestures, etc) 

I think that is a basic run down of Book Bites! 

Another tip: when I was sticky noting books this year for my teachers one of my first grade teachers came up with a wonderful hack! 
Not every book's pages are numbered. *wamp waa* and if they are not your personal copy then you may not be able to number them in yourself. So when typing or writing the sticky notes if they get misplaced or you need to remember where it belongs when teaching all you do it write the first few words from the page at the top of the sticky note.Genius right?!

Okay so onto the first Book Bites! If you want to see and hear along with reading go watch it HERE over on FB. (I am debating loading it to my YouTube channel as well)

In the spirit of back to school I am featuring this adorable book! 

Overview:
How Rocket Learned to Read stars an irresistible dog named Rocket and his teacher, a little yellow bird. Follow along as Rocket masters the alphabet, sounds out words, and finally… learns to read all on his own!

Teaching points:
Back to School, Learning to Read, Connections, Vocabulary, Verbs, Character changes
This book lends itself to multiple teaching points. Again, you would not address them all at the same time. But go ahead and make notes so you could always refer back to it. You could use it for B2S and then pull it back out when teaching verbs to showcase those pages.

Sticky notes:
Here are the suggested stopping points for this book- remember you will not want to do everyone all at once. These are front loaded so you decide when and how to use them. Grab them HERE.

Other ideas to incorporate this text:
-Do a book talk before reading to kids-this would be a little personal story you have in connection to the book. For example, you might tell about a teacher you had that made learning to read fun and not too scary. This just helps to really personalize it and model that for the kids.
-After reading-ask more questions (included on sticky notes), integrate into writing and make a class book "How ________ Learned to Read"

I will also use some short little acronyms in the stickys as well. You will decide when and where to actually stop reading and have your kids discuss so I give options.
T&T- turn and talk (incorporate Teach/Okay for Whole Brain)
TO-think out loud (more so for the teacher to do)

If you have any other questions please go watch the video to help get more of a visual!!


Stay tuned for the next full episode or even "minisode" where I will feature another fun book!

Have a BLESSED Weekend!! 


Monday, July 24, 2017

Subitizing DIY


Do your kids struggle with subitizing numbers? Subi-say what?! I know quite the mouth full huh? Honestly I was not familiar with this term in my early years of teaching. I think this definition pretty much sums (no math pun intended;) ) it up for us! 

Subitizing is the ability to 'see' a small amount of objects and know how many there are without counting. Subitizing is what tells you what number you roll on a six sided dice – most adults no longer have to count the pips after playing board games for a while.

Having the ability to do this at the primary grades really is so important for numeracy. It does transition over as well in the intermediate grades with higher order mathematics. 

According to The National Council of Teachers and Mathematics, one key part of effective subitizing is developing pattern recognition. Moreover, this mathematical skill allows students to gain a grasp of numbers and advance to higher levels of addition. As an activity, the NCTM suggests taking “snapshots”. Taking snapshots means showing an image of a collection of objects to the student for just a second, then asking him or her to take a mental “snapshot” in order to identify how many objects are included in the image. (http://mylearningspringboard.com)

Some benefits of subitizing:

*Saves Time-not having to count each individual member of the group

*Precursor for more complex number ideas-Students who can Subitize small groups of numbers are able to develop their counting skills by beginning their counting after the subitized group, or by using subitizing to count forwards or backwards by twos, threes, or even larger groups later when they are exposed to more complex multiplication tables. (Reys, et al., 2012) This type of subitizing falls into the category of conceptual subitizing which occurs with larger number sets, and involves  breaking the group into smaller parts (Clements, 1999). 

*Lends itself to learning addition and subtraction easier- it means that they are better equipped to handle addition and subtraction concepts, as they do not have to count each small group to be added or removed when learning operations with manipulatives (Reys, et al., 2012). 

Also having a strong base in doubles, number combinations, as well as making ten really creates the ability to subitize and group numbers together when in sets higher than 10. 

Having taught first grade the concept of subitizing was essential in our math journey. There are many activities you can do with kids to scaffold and teach them how to subitize. One quick and easy DIY I am listing below! 

We did this activity as a math warm up daily and it took us less than 5 minutes. Gosh, make it a race for them, bettering their time each time. This can be done whole group or small group. You can now get subitizing cards all over TPT,etc, but these little guys are cheap and require no ink! We made these with our math coach (Hey Jackie!) one year and I have been pulling them back out for my tutoring. All you do is flash the plate! 

Prompting some questioning while doing this as well really gives the kids a chance to express their math thinking and also gives you as the teacher a chance to hear if they really understand. 
Some examples of questions you can ask after flashing a plate/card: 
-how did you get that number?
-how do you know?
-what did you see?
-how did you group?

You could also hold up a plate and ask:
-what is one more/less than this number?
-what is ___more/less than this number?
-is this odd or even?

Some responses I have heard from kids might be:
-it is 8 because I see 4 here and 4 here and 4 and 4 make 8
-it is 6 because I grouped 4 and 2
-the number is 9 because I see 4 and 4 and one more make 9
This also lends itself to eventually add three numbers as well because of how they are grouping combinations. 
I have also heard kids say "Well I visualized that dot moved down to make a row of 5 then added the extra dots" *mind blown teacher* right?! When you can get your mathematicians talking and discussing like that it is amazing!!! 

It is also VERY important to point out and let the kids discover there may be more than 1 way to subitize and get to their answer. I often have kids say one of the responses above and another kid say a different way they saw it but still are able to produce the same number as their answer. 
I have also seen firsthand how quickly they get better at recognizing numbers, building that number sense, and utilizing strategies to make the combinations faster (make ten, doubles, etc)


So onto the DIY:
Materials needed: paper plates (we used the small ones and the cheapest ones)
                             sticker dots (two different colors)
Then add the dots in different configurations on the plates! 
Use my plates as an example.


Also, what if you put subitizing configurations in a math station and some extra plates, index cards, scrap paper, sentence strip pieces, etc. and they create their own subitizing cards with dots, paint, bingo dotters?! EEK how fun right?

Some other ways to incorporate subitizing into your daily schedule:
-put subitizing dots on your stations instead of the actual number
-subitize as an entrance ticket in the morning on their way through the door
-display your number line with dots under each number

Kids can subitize things other than dots:
-fingers
-tally marks
-pictures


A few minutes a day will make a difference! 

Have a Blessed Day!

"Be Good to People"


Tuesday, July 4, 2017

Keto on the Go!


Today's post is slightly off the teaching subject, in a way. I guess I will still be teaching, but just about another one of my favorite things....FOOD!
The hubs and I have recently (5 weeks ago) started eating Ketogenic-ly. I am not an expert so if you'd like to read more "information" about it please visit this site. Today's goal is to share a bit about our journey and how we maintained it while traveling recently.

Disclaimer: I have not done a ton of research on all of this and I am not a certified nutritionist so I am only speaking from what I have seen in passing, what my hubby tells me, and what has seemed to work for us. 

A few weeks before starting Keto I had decided to get off dairy too cold turkey. I had been having some crazy bloating and stomach issues for a few months. Which was weird because I have eaten dairy my whole life and never had any issues, but just goes to show you how things can change. So I started just doing lactose free milk and it didn't get much better, so then I just stopped. No milk, no cheese, no dairy, only almond milk. You guys, the bloating stopped, my stomach felt soooo much better and my face cleared up! I have been going to the dermatologist since middle school and now I literally don't think I have to be on meds anymore! It was that good of a turn around!

So back to keto. We looked up keto recipes, made lists, went to the store, and spent the whole Sunday meal prepping for the week. Now I am not a chef or a baker by any means, in fact, I'd rather not, but it was actually fun to methodically think through what we were going to eat and how healthy it all was. Now some say Keto is not something you can maintain forever, some opinions differ. I am not getting into all of that. Our goal was to mainly try it for 6 weeks and see what the results were. I mean it wasn't night and day from how we were eating, it just made us more mindful of what we bought (like chips,bread for toast, eating out, etc). 
We stocked up on eggs (no shocker there for us), bacon (uncured-no nitrates/nitrites), spinach (just be careful how much you can get kidney stones), broccoli, salmon, meat, pork rinds, etc. Here is a graphic for the types of foods they suggest.


Once the first week was over it was not so hard. I didn't lock myself in the room in the dark and rock back and forth screaming for cakes and bread, I only had one carb dream ;) haha jk. It really just ended up becoming a habit for us. I was able to learn new recipes, especially some sweets to cure the sweet tooth cravings. Now depending on who you talk to as well as with any eating regime it can be taken extreme or you can fall off the wagon day 1...we are more of the sitting in the wagon type of people. We are going to take it seriously and try to meet our goals but not dissect every little tiny thing. When we would eat out we did take our time to decide where it would be and if they had anything we could turn into Keto friendly food. For the most part it was rather easy. Which brings me to the whole point for today's post. How to be on the go with Keto. Again, I am not going in depth about the origins of Keto, or research, etc. This is mainly for anyone who has started and needs to travel and how you can possibly still stay true to the course even while traveling, where your diet could be sacrificed. Also, these are just ideas, they may not work for you. That's okay! Just merely suggestions.

We were traveling to Colorado. So our first leg of the trip would be about 8 hours. The second day about 5 hours. We had a large cooler and bought ice for the first half of the trip. We made sure our first hotel room had a fridge and microwave in it as well.

The night before we spent time preparing. We prepared: egg salad, Mcgriddle, and cookies.

Grab the egg salad recipe here


Grab the Mcgriddle recipe here (we used bacon instead of sausage)

Grab the cookie recipe here (we left out the chocolate chips)


For snacks between meals we packed: almonds, protein bars (keto friendly), sunflower seeds, almond butter spread, pork rinds, and beef jerky.

We mainly snacked on the road and ate some of the cookies (mainly b/c I accidentally used salted butter for the cookies and it actually came out like little corn bread cookies haha-keto friendly of course)

We did stop at Mcdonalds for a quick lunch and had the burger without the bun, no ketchup, and add mayo.

Once we arrived at the first hotel we had the egg salad to snack on and we were able to eat the Mcgriddle that morning since the hotel had a microwave.

Once we arrived in CO, we were staying with his gma so making food was much easier! We still had leftover egg salad to munch on as well! For meals throughout the week we stayed the course!
Breakfast: eggs and bacon
Lunch: egg salad, rotisserie, burger no bun
Dinner: pot roast, raw broccoli and ranch, avocado, salad, radishes (this lasted two days or so from leftovers)

We snacked throughout the day on some of the items we had brought with us from above!

On the way home we didn't have the ability to home make as we did on the way to CO. We still had leftover snacks but we did have to stop and get fast-food once on our first leg on the way back. We just did what we had before-hamburger but no bun!

When we got to the hotel for the way home we were able to eat a fresh salad with veggies and hamburger meat with bacon and a fried egg on top!

We were fortunate to be able to stay with his gma and us be able to cook with her. However, we were so happy we decided to cook items before we left for the trip to be able to really watch our intake on the road, especially when it can be very tempting to not pay much attention to your eating.

Now I will divulge on our way home we stopped at Ihop for eggs and bacon, but once we got there we saw the new cupcake pancakes and decided to go for it. At first I was hesitant because, I mean we went to all this work all week to stick to our plan and now the last few hours of the trip we were going to ruin it?! But, no, it was not ruining it for us it was a moment of "live your life". We had made it 5 weeks AND a major road trip on our plan! We limited ourselves to 2 and we went right back to keto for the rest of the day/week! We just have developed the habits of choosing our food so the pancakes were not something that threw us over the edge like a wild animal that gets a taste of fresh meat.
Oh and yes they were worth it for a little cheat meal,no calories wasted there! :)


I am still not completely sold on high fat the true way Keto calls for it for long periods of time, but I also need to do more reading on it. Like I said above we aren't driving the Keto bus but merely just some passengers enjoying a new way of eating and if anything it is teaching us to think more clearly about our choices and when it is okay to indulge.

I will say I have enjoyed my face clearing up and I have also noticed I have had much more energy naturally and not so zombie like after eating!

Even if you aren't doing Keto, maybe you found some new recipes to try out and enjoy something different!

Have a BLESSED week!


Wednesday, June 21, 2017

Looking for some organization and fun new products

Attention all Instructional Coaches!!!

 The ICD for the OCD
Instructional Coach Detailer for the OCD is all updated for the 2017-2018 school year! 

Let's face it, the IC job is multitasking at its finest! You don't have time to be scattered in your thoughts! Use the ICD to help you be OCD! 
This Instructional Coach Detailer is the perfect planner to help you balance all of your plans, notes, and to-do's!

What is included?
-Two different versions: ELA & Math/Science-Monthly overviews August - July (free updates each year!)-To-Do checklists with each month-Space to put sticky notes so they are never far away-Positive quotes to keep you going- Team planning overviews- Notes for meetings-Pages of team minute notes for team plannings-Teacher Checklists-to keep information of teachers easy


Print this in color or even just black and white!You can print as is, or rearrange pages in a spiral bound form or binder. Need more of a certain page? Print just what you need!Put it all together or make separate smaller books.Add in your school calendar, etc! 

If you'd like a custom cover I am happy to do that! Just email me! Email is listed in TPT product description page!


Suggestion: Print cover in color on card stock and print the other pages on regular paper (helps with printing cost)

***FREE updates each year!! 

Click HERE for ELA
Click HERE for Math/Science


Need more inserts? Check out my IC Quick Sheets to add to your planner and keep track of your coaching with teachers! (under the organization tab) or link: 


I also just added some A La Carte pieces you can add to ANY planner!


Check them out HERE (they are free for now so grab them while you can!)


Last thing for today! I just finally got around to posting my newest edition of Monthly Jam- where I showcase my favorite 5 items in under 5 minutes!  I would love anyone who would like to participate to join me! You can see the original post HERE if you'd like to know the "guidelines". 

So I posted this one over on my YouTube channel....it is just up and going so please be gentle :) I'd love it if you'd subscribe while there too! 
Click HERE to watch! 


Have a Blessed week!!! 
"If we say we are HIS, we must follow the example of Christ."
1 John 2:6